MY STORY, or how did I get here anyway?
If there is one question I am asked more than any other, it’s this. Why would you make paper when you could go out and buy it?
The short answer is this:
I began my “career” as a pulp painter as an art student too broke to purchase commercially made paper, I hooked up a garbage disposal in a corner of the printmaking studio-pre-OCEA, it was the 1980’s after all-and used it to grind scraps of discarded paper into soggy pulp. At first, I formed the pulp back into some resemblance of paper, but eventually I began using different colored pulps to paint with. In this way, I took a material that had been intended to be the recipient of media and flipped it into the medium itself. My future as a pulp painter was off and running before I even had a name for what I was doing.

Working on a silkscreen print. I couldn’t find a photograph of me in the studio at SUNY Oswego where I was a student. I found this photo while I was an apprentice at the Women’s Studio Workshop, summer, 1983. I wrote a blog about this experience, which I remember as being very hard, and very worth it.

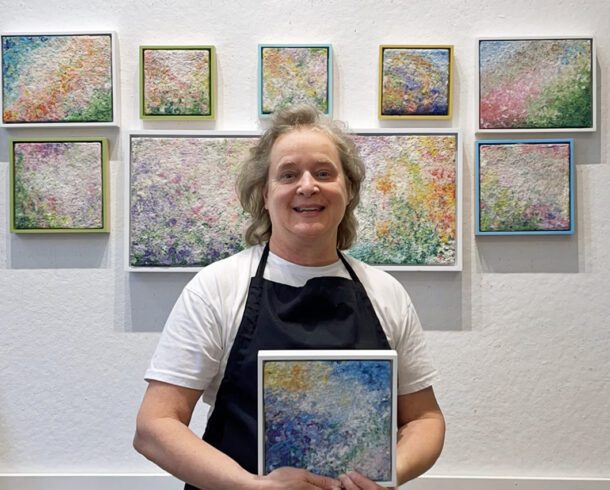
Viewers often comment how much they love the texture in my artwork. My subject matter is nature, which is full of texture, color, and shapes. These qualities create the emotional pull nature has on us. The medium I currently use is abaca, an organic fiber used since ancient times to make rigging for ships, clothing, paper, tea bags, and more recently PPE during the pandemic. By using this organic material, I can recreate the many textures and colors of nature.
I went on to earn a Master of Fine Art, and a PhD in Art Educaiton. I have been a working artist and college level art educator for 35+ years.
If you would like to join me on my jouney, and purchase a work of art, or discuss a commission, please contact me. I’d love to work with you.
To learn more about my pulp painting process, watch the videos below.

A step-by-step explanation of my pulp painting process.
How I create my artwork
The most common question I hear from other artists, galleries, and collectors is “How do you create your artwork?” That is, how do I paint with pulp and how do I make the paper on which I paint? In response, I have outlined, step-by-step, the process of creating one of my paintings.
People are often surprised when they realize how physical a medium paper pulp is, due to its weight and texture. It is shapeless and colorless when first beaten, and because it remains immersed in water until needed, it is also cold and sticky to the touch. As the creative process unfolds, the pulp takes on a marvelous life of its own.
The unique properties of the pulp remain evident in the work and help to define it with texture and unevenness. When the pulp comes together as one unit or composition, a work of art exists.
Even though I am constantly learning new ways to express myself with the pulp, years of working with this material allow me to experience its potential and limitations.
These years of experience have yielded, and refined, the pulp-painting process described in more detail below.


STEP ONE: Forming the base sheet
The grids in the screening allow excess water from the pulp to drain and eventually exit through an opening in the bottom of the table. Once the pulp is poured, I fold over the screening at the corners to make a more even sheet.
STEP TWO: Applying the middle-ground colors
I use the turkey baster to extract the water/pulp mixture from smaller containers I mix the over-beaten abaca, which has been beaten for up to six hours, with the pure pigment and Tororo-neri (a sticky extract from the root of the Japanese okra plant). I funnel this mixture into a squeeze bottle whose small opening allows for more precise mark making.
STEP THREE: Using overbeaten abaca
The process of layering colored pulp, over-beaten abaca, and collage elements continues through the evolution of the artwork.
STEP FOUR: Painting the foreground
If I deem a painting unsuccessful, it is recycled back into pulp by being shredded and re-hydrated in the Hollander. The newly recycled pulp can then be used for future base sheets.